
How To Shorten a Dress Shirt AND Still Wear it Untucked
You’ve got a dress shirt that’s too long and you want it to be shorter right? But you also want to be able to still wear it untucked too? You think you’re screwed, but you’re not! You can shorten it yourself, just use a basic used $50 sewing machine.
Here’s The Tools We’re Gonna Need:
Before we dive into the nitty-gritty of shortening your dress shirt, let's make sure you have all the necessary tools on deck. Having the right equipment will not only make the job easier but also ensure a professional finish. Here’s everything you’ll need to gather before you start:
Fabric Marker or Chalk: We’ll use this to mark the measurements on your shirt accurately. Chalk is great for darker fabrics, while a fabric marker (it looks like a colored pencil) is easier to see on lighter materials.
Measuring Tape or Ruler: This is gonna be essential for getting accurate measurements, especially when dealing with the bottom curve of the shirt. A ruler is ideal because it’s rigid and will help you get a straight measurement from the bottom of the hem up to where you want.
Seam Ripper: We’re gonna use this to undo the stitches without damaging our shirt (ideally). It’s a must-have for any alterations or repairs. Get an ergonomic one if you can because it’s much more comfortable than those small crappy ones that come in emergency kits.
Sewing Pins: These are gonna hold your shirt in place as we adjust the length and create a new rolled hem. They’ll stop that hem from shifting on you.
Scissors: A sharp pair of fabric scissors is crucial for cutting cleanly and accurately. Don’t use your regular household scissors that you have in your utility drawer as they might not be sharp enough for fabric. Get yourself a pair of dedicated scissors for projects like these and don’t let ANYONE use them for anything else. They don’t have to be fabric scissors specifically but they should only be used on fabric. Make sense?
Sewing Machine: While you CAN hand-sew, a sewing machine is gonna be about 1000 times faster Plus, it provides a stronger, more uniform stitch that will hold up just like the original factory hem.
Denim Needle: We’re gonna wanna use a stronger needle for this project. A denim needle will come in clutch. This is key because the hem we’re sewing is gonna be thicker than normal, and a regular needle might break or not be able to handle it.
Iron and Ironing Board: After sewing, you’ll want to press your shirt hem to give it a crisp, professional look. An iron is also used for smoothing out any wrinkles before you start marking and cutting. Wrinkles and sewing don’t mix!
Thread (duh): Match the thread color as closely as possible to your shirt. It doesn’t have to be an EXACT match but you wanna get it pretty close.
Let’s Do This Bro!
First off, we're chopping off 1 inch (or 2.5 cm) off this shirt. But, plot twist, we're actually going for three quarters of an inch (about 1.9 cm). Why? Because we’re rolling up that hem later, Big Tymers style. Ya know, Everybody Get Your Roll On? But first you wanna flip your shirt inside out.

Use your ruler to determine how much you want to shorten your dress shirt by. I’m doing 1 inch or 2.5 cm.
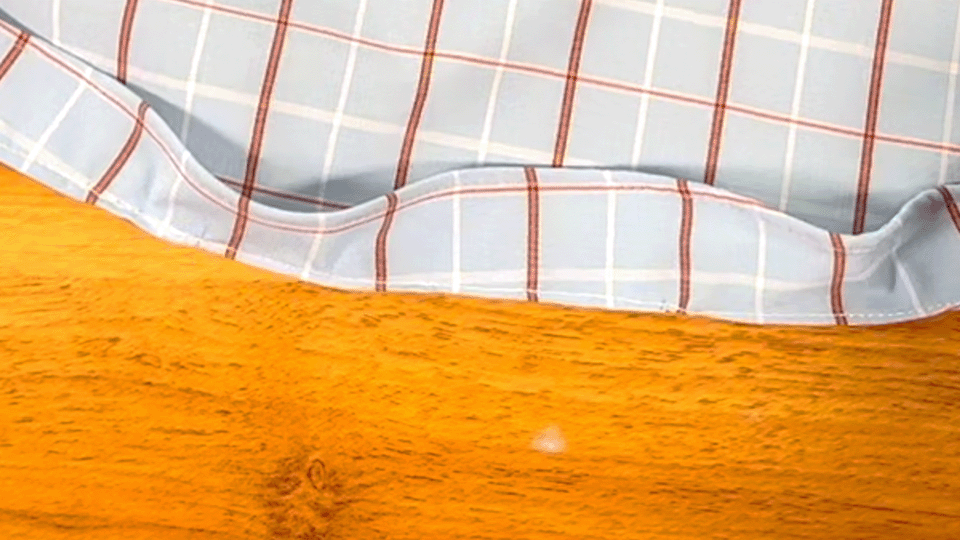
Measuring Up: No Straight Lines Here
Grab your ruler, but don’t even think about measuring straight up from the bottom—your shirt’s hem isn’t a flat highway. Since we're dealing with that curved hem, you’ll wanna align your ruler with each curve change and mark up from there instead. Mark up and draw a small dot about every inch or so. Now make some straight lines between all of those marked points. These dots and lines are gonna look more like a constellation and you’re gonna be like “WTF am I even doing?” It’s all good, it has a purpose.
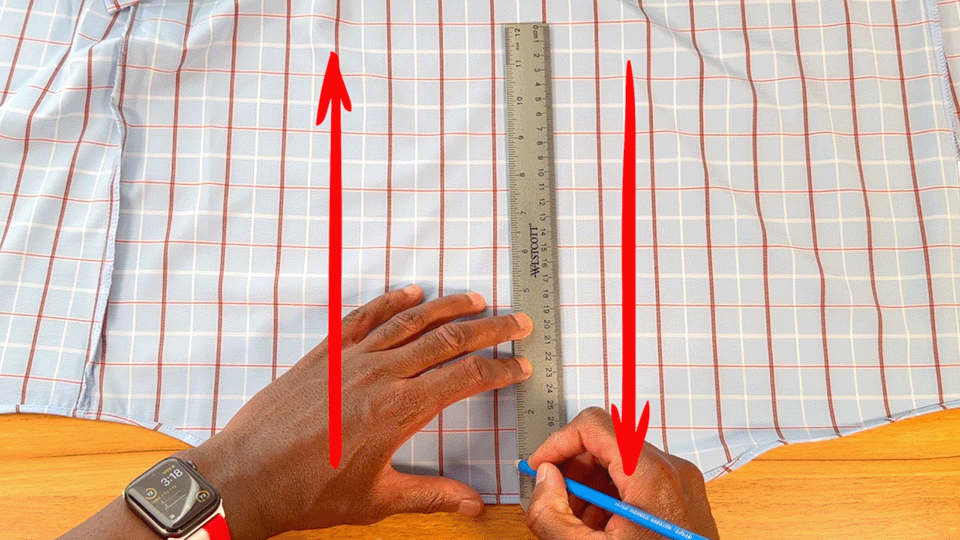
Don’t measure straight up and down. Your hem curves, so we want our measurements to follow that factory curve.
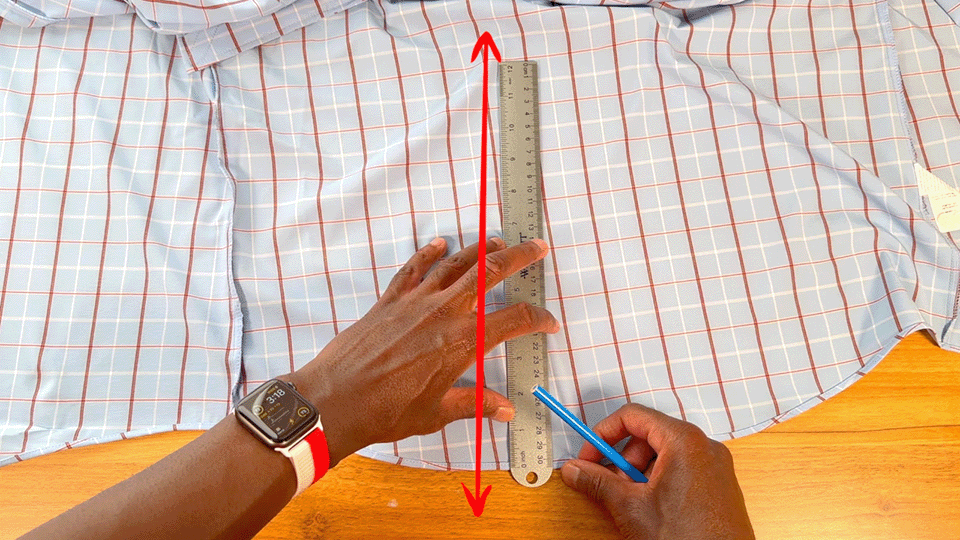
Position your ruler at an angle straight up from the curve of the hem.

We don’t want to include our factory hem in our measurements, so I’m taking off .75 inches or 1.9 cm.
Marking Territory: The Fabric Marker Fire Dance
Take your fabric marker or your chalk and connect those dots together. Resist the strong urge to curve the line as you draw; we're looking for a straight celestial map here. Remember, if it looks like a constellation then oddly enough you’re doing it right!

No curved lines, just straight between each point.
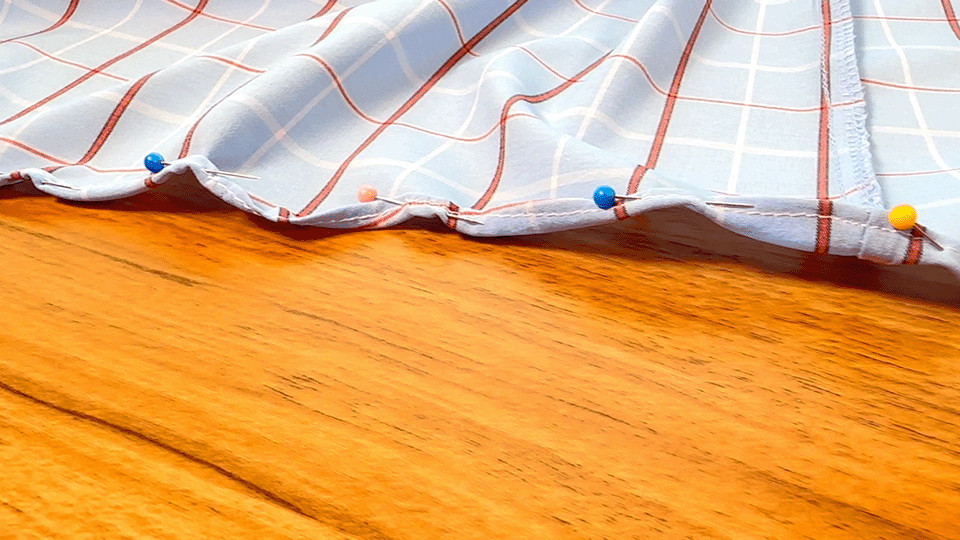
Pinning Down the Cosmos
Once your line is drawn, fold the shirt up at each marked point and start pinning. You’ll want to put a pin every inch or so. Notice the shirt starting to curl at the top? That’s exactly what we want. If your shirt looks like a crumpled mess you're on the right track. We're adding a deliberate curve to material that wants to be straight. So something has to give, we need to push off our curve somewhere else temporarily so to speak.

Pin up from each of those dots that you made with your marker.

See how my shirt is curving? That’s good, we want that.

Your pinning job will look…well interesting but it’s ok, it has a purpose.
Sewing: The Curve Master
Now, bring in the big guns! We're using a denim needle because we're sewing a hem that’s thicker than a Snicker, and we need our sewing machine to be able to handle it. Set your sewing machine for a straight stitch, and the stitch length to 2.5. Start your stitch about a quarter inch or roughly 6 mm from the very bottom of your dress shirt. As you sew, pull your shirt flat with your fingers and keep that line that you’re sewing straight. You’ll see the bottom of your shirt start to curl up as you sew, and you’re gonna think somethings wrong. it’s not, that’s exactly what you want!
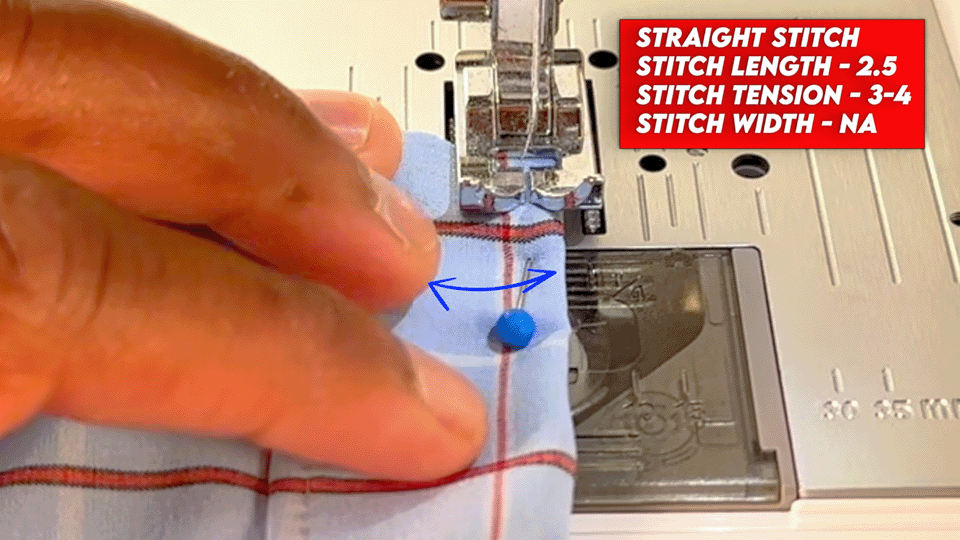
Sew about .25 inches or 6.3mm from the bottom.
See how my dress shirt hem is starting to curl and get all wavy? That’s ok we actually WANT that!
This is what it will look like after you sew that first stitch.
Trimming the Fat
Once your initial stitch is locked in, cut off the excess fabric inside the shirt as close to that stitch that you just made as you can. Take your time here; don’t rush, or you might cut through the stitch you just made. But it’s ok, even if you do, relax. It’s not the end of the world, or the end of this project.

Cut off the extra fabric as close to that stitch that you just made as you can.
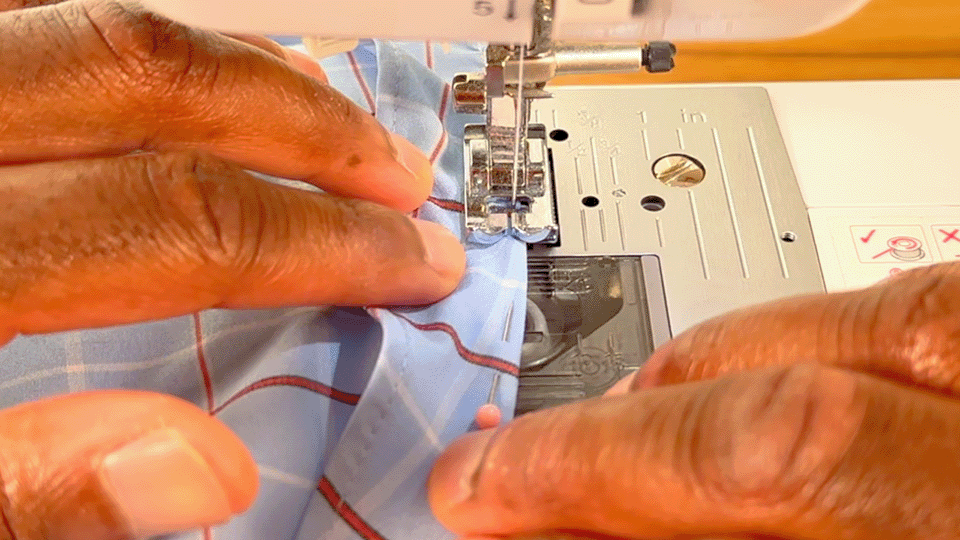
Rolling and Pinning: Double Down
Now, take that hem and roll it back on itself once. Pin it up again with your sewing pins so that it’s all held in place. Sew another straight stitch, trying to stay on top of or as close to the first stitch line as possible. This part is tricky because the space is tight, and you might find your stitch line wandering off a little. That’s totally okay—if that happens it’s all good! Again, you won’t ruin your project.

Roll that hem back on itself one time.
Once again it will look interesting…but these pins are just there to hold it in place.

Sew a straight stitch right on top of or as close to the other stitch you just made.
The Final Reveal: Rock That Hem
BOOM! A nice shortened dress shirt with a curved hem that's perfect for wearing untucked! Wear it with pride, pair it with some gator boots or those shiny Gucci shoes. Yes, that makes 2 Big Tymers references now.

Your new curved hem should look something like this.
You Did It!
Feel ready to take on more? Let’s go learn how to shorten a dress shirt sleeve thats too long. I’ll see ya over there, SD out, deuces!