
DIY Tailor Your Shorts for a Rocking Summer Fit
When summer hits, we all want to look our best in some bomb-looking clothing. I think “drip game on point” is the way they say it now. But what’s the plan when you come across a great pair of shorts that fit quite right? Wear them anyway and settle for the fact that you don’t like them that much?
NO!
You bust out your sewing machine and DIY tailor those bad boys yourself! All it takes is some very VERY basic knowledge of how to use a sewing machine. Like REALLY basic.
I got these shorts at Old Navy and I initially liked them a lot. Nice deep black, comfortable and breathable with just the right amount of stretch to them too. But they ever so slightly flared out at the bottoms in a way that bothered me more than I thought it would. Finally one day I said “screw this, I can easily fix this problem!”

Small changes can make a MASSIVE difference…
Let’s Start By Figuring Some Things Out
Ok so the first step in tailoring your baggy shorts is to figure out how much you wanna alter them. Put your shorts on and stand in front of a mirror. Pinch the fabric at the sides of each leg to see how much you need to take in for them to look and feel just right. You want to bend your knee as well to make sure they aren’t too tight when you’re sitting down giving you some mad moose knuckle. You want them to be slimmer but not tight.
Once you find that sweet spot, put a safety pin or a clothes pin to mark the spot so you don’t lose it. We’re gonna do this again because it’s that important (ask me how I know): move around and get down bro! Sit down, stand up, bend, and stretch! Remember, moose knuckle…
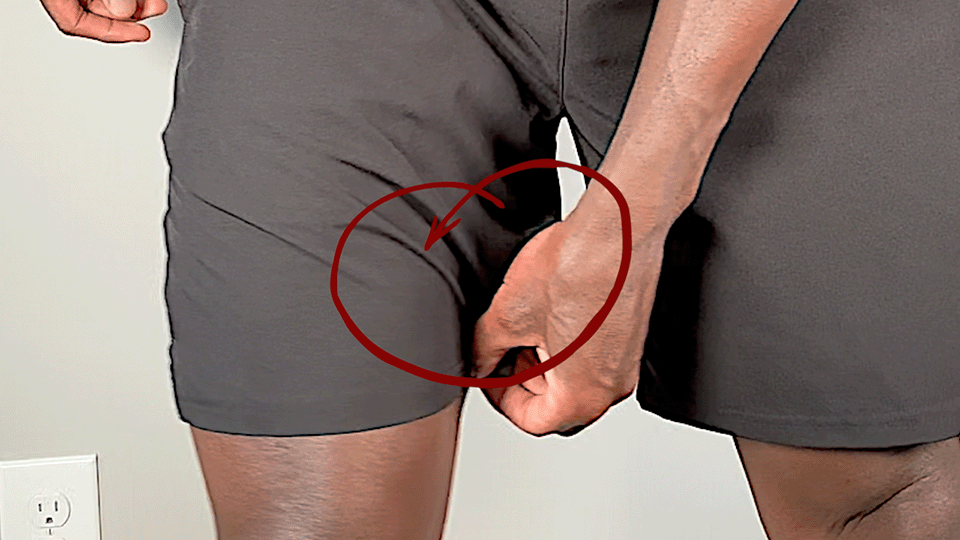
Pinchy pinchy
Measure and Mark(y) Mark Time!
Now that we know how we want them to fit roughly, turn those mofos inside out and get ready to make some more precise measurements since our pinch and pin method isn’t repeatable on other shorts of a similar size. Find where you placed your safety pin or clothes pin—that’s your reference point. For me, I measured about 3/4 of an inch or 19 mm off at this spot, but I rounded up to a full inch or 25 mm for a cleaner measurement. Remember, since you’ll be sewing in from both sides of the seam, you’ll actually be doubling this amount (which will be 2 inches total or 50 mm). I like to just stick with remembering the number on one side when I’m measuring anything since it’s easier than doubling it every single time. But either one works, so if you want to double it or stick with the first number you want to make sure you’re consistent across your tailoring projects.
Ready to rock and roll!
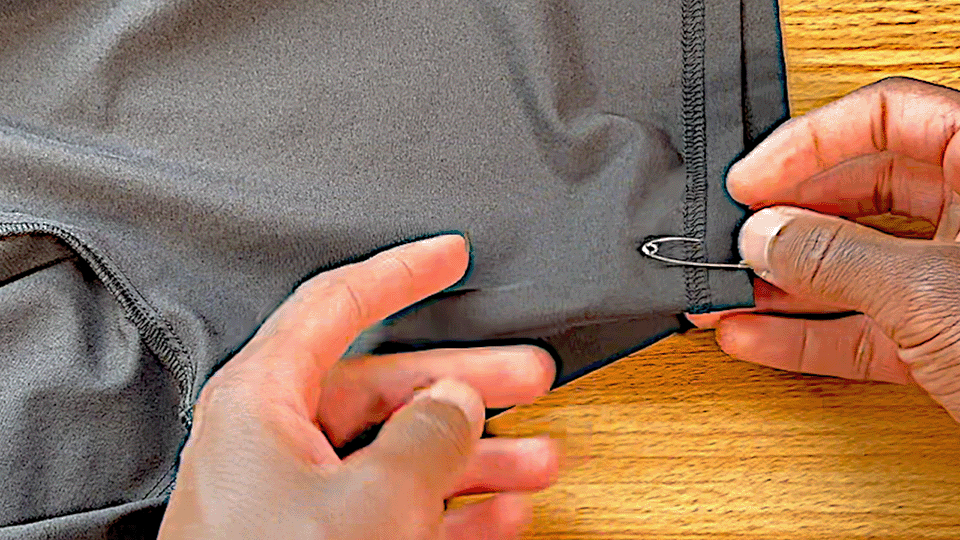
Next, put a small little sewing pin guy at the very bottom of your shorts to hold everything together. You don’t want it getting shifty on you now…
Measure roughly where that safety pin was
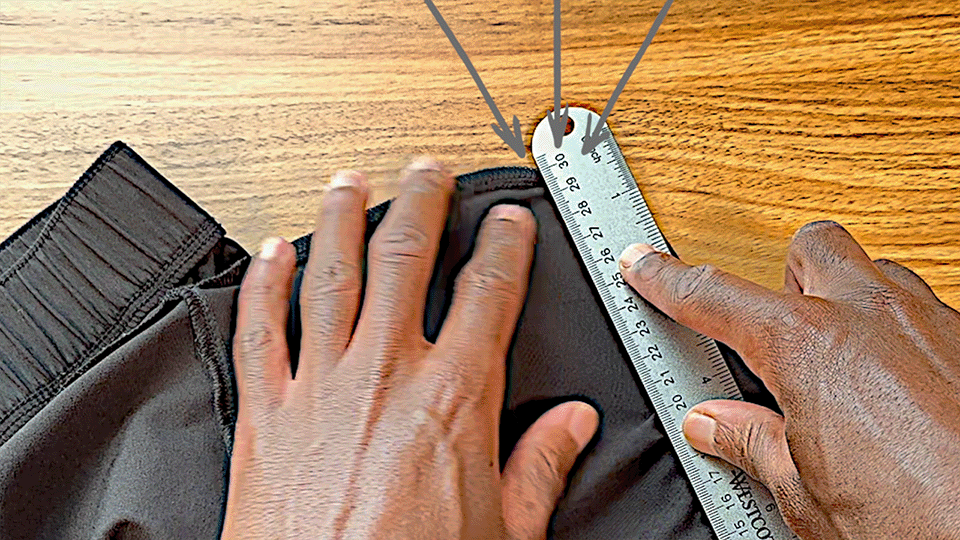
Take a tape measure or a ruler and find the inseam length, then divide it in half. For example, if your shorts have a 7-inch inseam (which mine do), you’ll mark at 3.5 inches. Place another pin here. This will be for a nice gentle, gradual taper.

Put another sewing pin about halfway up your shorts.
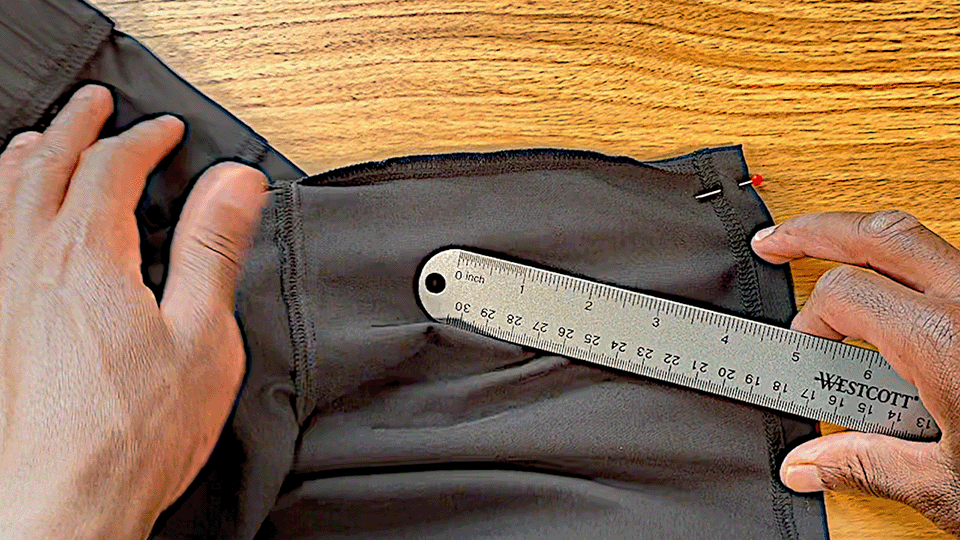
Add one more pin closer to the top, near that crotch seam of yours. This pin acts is gonna be a reminder for us to stop tapering—basically telling you, "Hey, stop here! It's time to finish up!"

Put another sewing pin by your crotch seam.
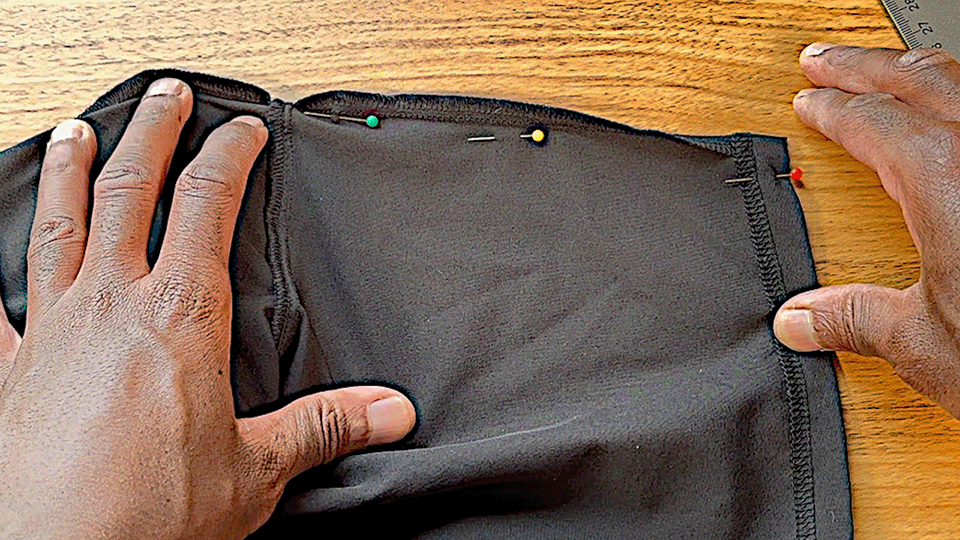
Nice gradual taper!
Lets Stitch These Mofos Up!
Now, set up your sewing machine to make a standard straight stitch with stitch length set to 2.5 (kinda like it always is). Start with a backstitch to lock in your stitch and just connect the dots between the pins you’ve placed.

Use those sewing machine settings unless your fabric is different.
When you reach that last pin near the top, that’s your cue to be done with your taper and get the heck out of there. You’ll wanna make your straight stitch blends nice and smoothly into the original seam to maintain the shorts’ structure and strength.

Finish up with a nice gradual taper and be done by the last pin.
Finishing Touches And Loose (Thread) Ends
Once you've finished stitching the new much better looking seam, cut off the excess fabric, leaving about 5/8ths of an inch or 12 mm for your seam allowance. That’s just a fancy term for the distance between your new edge on your shorts and the sew stitch that you just put on there. Why they call it that I don’t know, it doesn’t really make a ton of sense to me…

Nice new gradual much better looking straight stitch.
You’ll want to cut off the extra strands of thread you see as well, especially the ones at the bottom. It’s not that it ruins your project or anything it just looks kinda stupid with thread dangling down tickling your leg.
Ask. Me. How. I. Know.
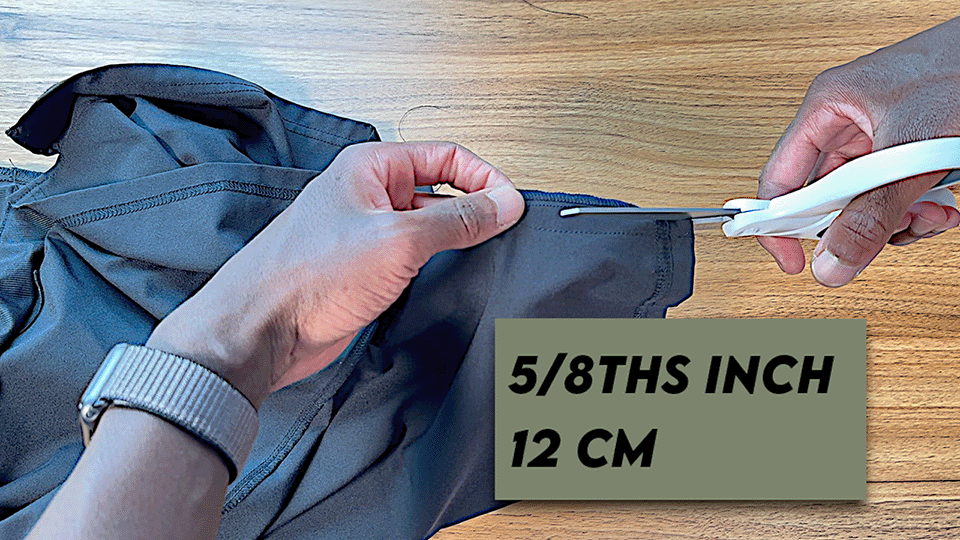
Cut off the extra fabric for your seam allowance.
The raw edges. you just made from cutting are going to fray, and we don’t want that. Go over them with a zigzag stitch or use some pinking shears if you want. My shorts are a synthetic material so they won’t fray hardly at all, but if you’re slimming some cotton shorts or something similar then this is the way to go.
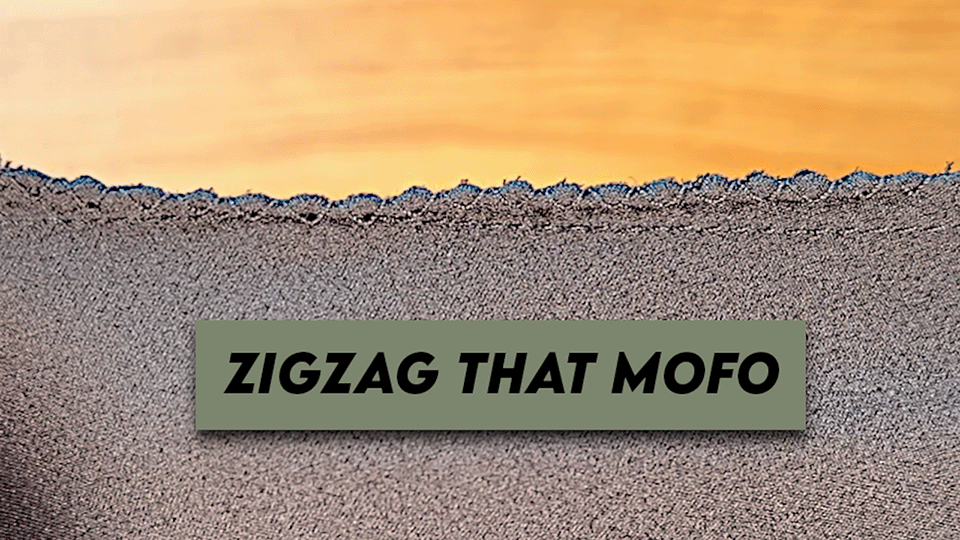
Zigzag stitch over the edge to prevent fraying.
BOOM! You DIY Tailored Your Baggy Shorts!
And just like that, these stupid flared Old Navy shorts have been transformed into my favorite summer time shorts. Pair yours with a DIY tailored t-shirt just as easily as these shorts for a polished summer look. That’s all I got for ya, SD out, DEUCES!