How to Tailor Your Pants Without Making the Seams Twist
I’m SD and I teach guys how to tailor their own clothes on YouTube.
Let’s say you’re a guy who’s finally tired of wearing pants that look like they were designed for somebody else 7 times your size. You stumble across the idea of tailoring your own clothes because, basically, I won’t shut up about it.
You watch one of my tutorials, grab a pair of chinos or dress pants , turn them inside out, sew a new seam, cut off the extra fabric, and try them on. And at first? Hell yeah. These fit way better than before!

Then you look down.
Hold on.
Why is the side seam twisting like its trying to say hi to the front of your shoe? Why is the fabric pulling all tight and weird around your calves? Why are your pants sitting differently on top of your shoes?
And most importantly, why did nobody warn you there was geometry involved in this?

Welcome to something I call pants twist. I call it that because, well, your pants twist. Very scientific.
Pants twist happens when one or both seams on your pant leg rotate away from where they sat before you tailored those pants. Usually the outside seam starts creeping toward the front of your leg at an angle.
That’s pants twist. And this is one of those things that can throw beginners off because you’re thinking, “Wait. I tried to make my chinos slimmer. This guys said it was easy. Why do they look way worse than before?”
The problem isn’t that tailoring your pants is hard at all, or that you messed up.
It’s that tailoring pants is easy, but it isn’t simple.
There’s a difference.

What is simple however is learning how to use a sewing machine for this. You only need to learn like 4 settings and it’s off to the races. I make a tutorial you can check out here.
A lot of beginner tailoring tutorials accidentally make tapering pants look like this: turn your pants inside out, draw a line, sew the line, cut off the extra fabric, boom, slim pants.

And technically, yeah. But a lot there’s more going on. Your pants aren’t just two flat pieces of fabric. They wrap around your leg. They bend when you sit. They move when you walk. They stretch around your thigh and calf.
They interact all intimately with your knee. Basically, your pant leg is a three-dimensional tube wrapped around another three-dimensional object: your leg.
When you taper your pants, you aren’t just changing the width of the leg. You’re changing the shape and structure of that entire tube.
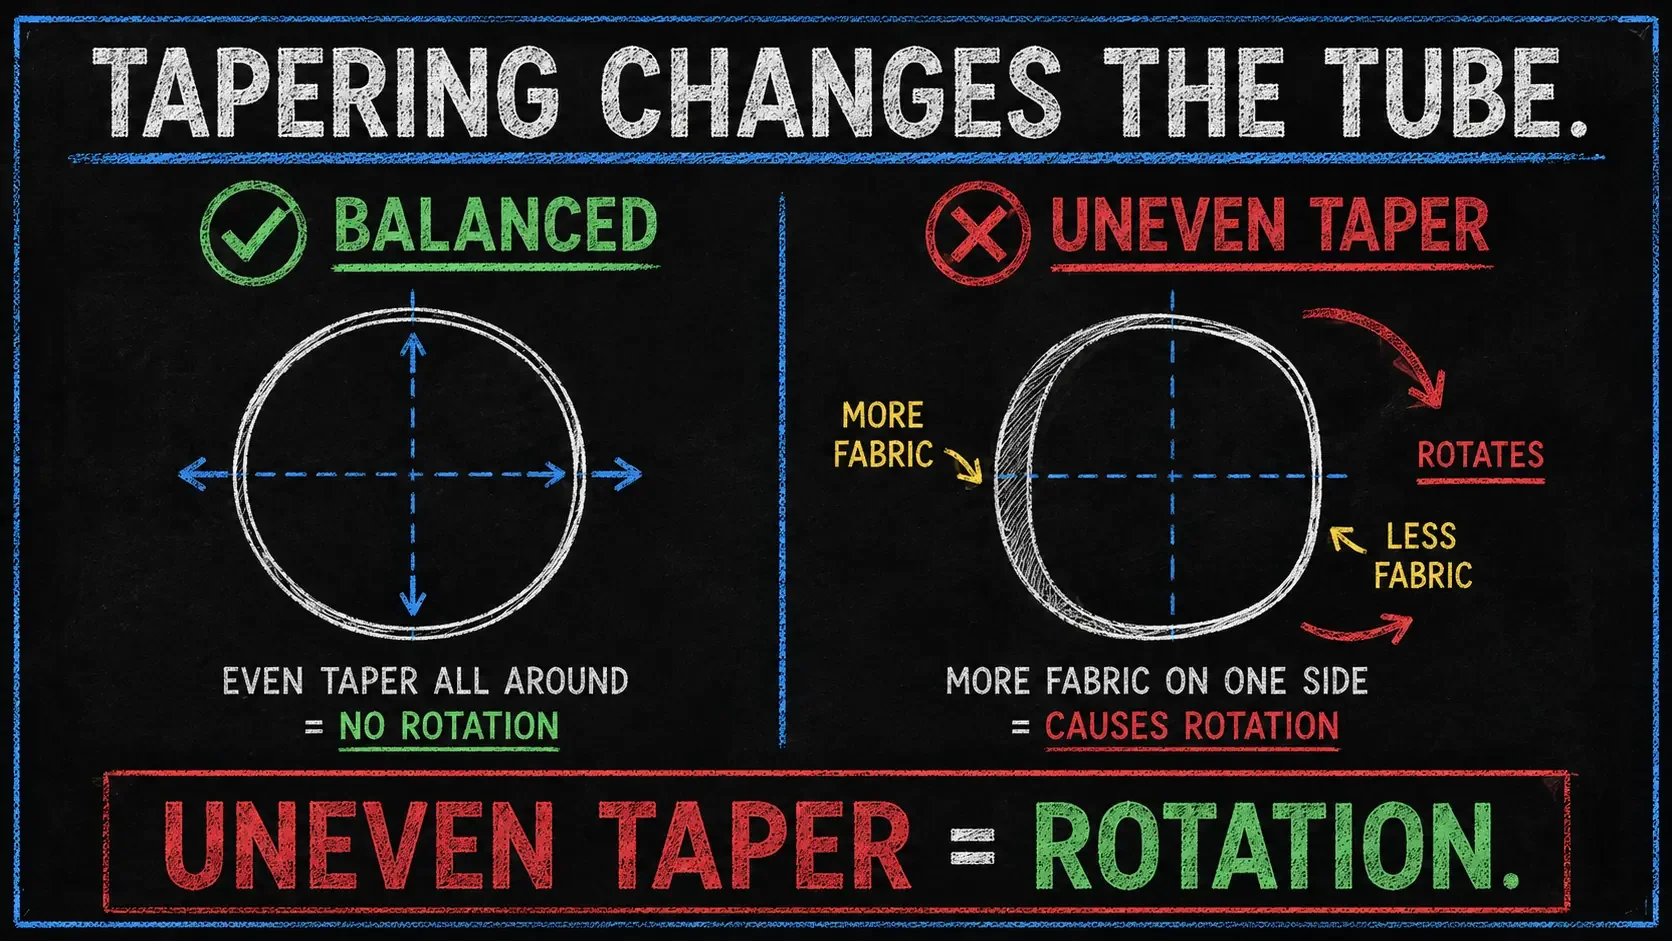
Think about your pant leg like a big tube of fabric with two lines (seams) on each side. If you remove fabric from one side of that tube, the rest of the tube has to move around and reposition itself.
The lines (seams) can’t sit exactly where they were before because you’ve changed the overall shape. So something has to give. And it’s usually those lines (seams).
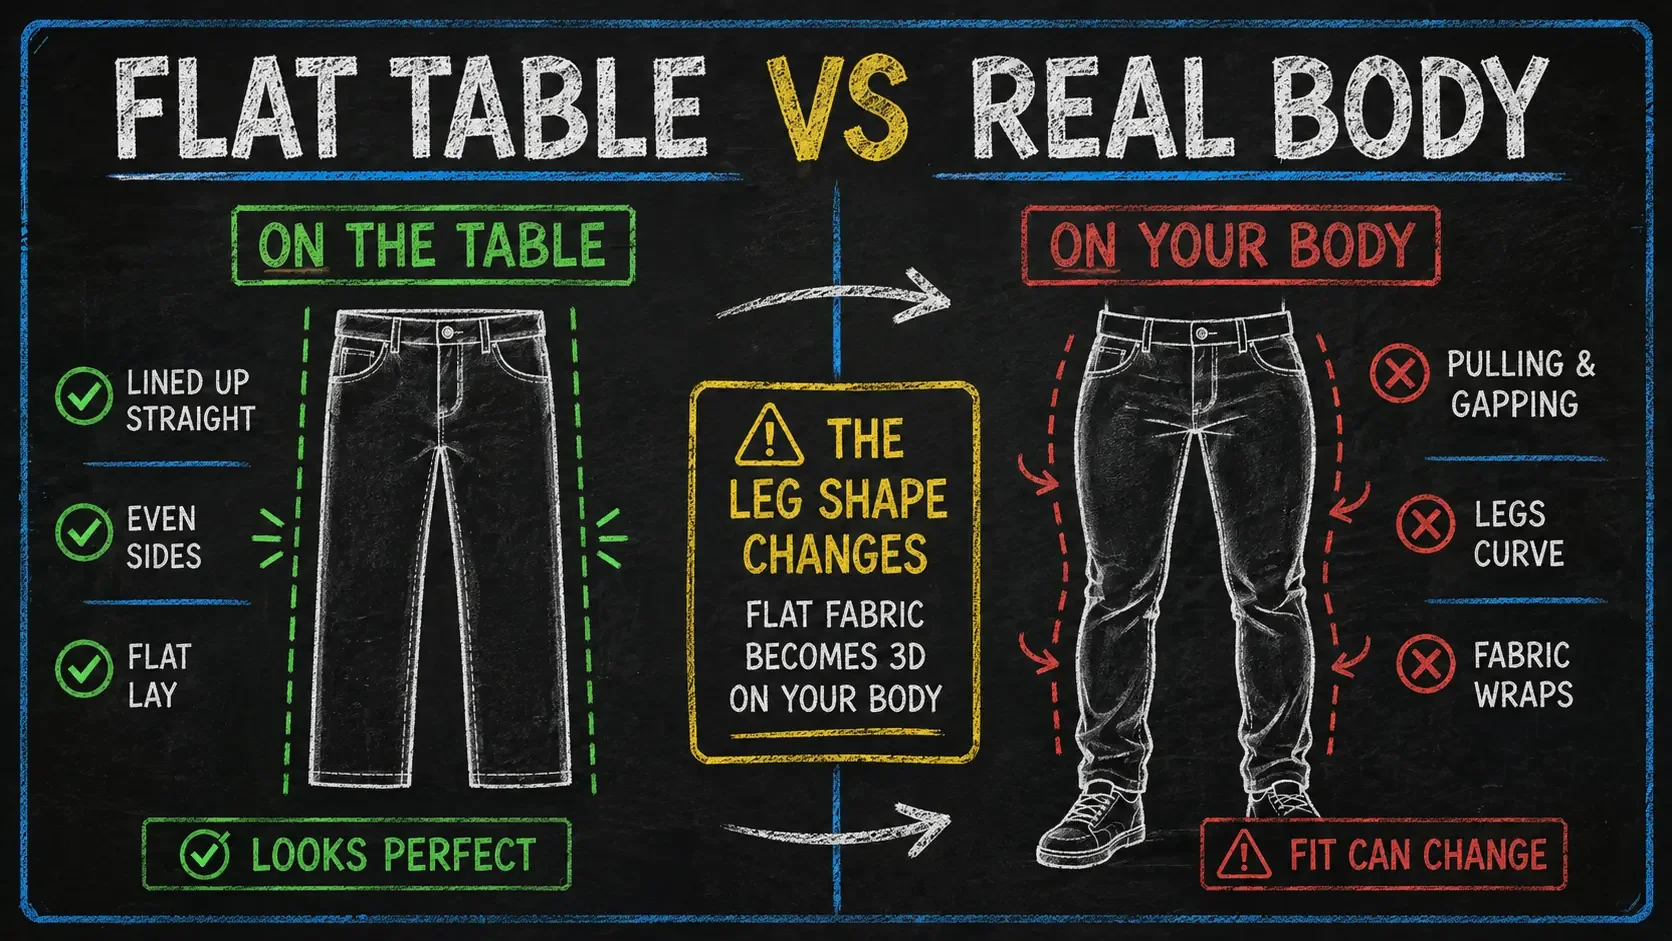
That’s why tailored chinos or dress pants can look perfectly normal lying flat on your table and then suddenly act drunk when you put them on.
When your pants are sitting on a table, they look two-dimensional. You see the inseam. You see the outseam. The inseam is on the inside. The outseam is on the outside.
But once you put those pants on your body, those seams become part of a three-dimensional shape.
And both seams help control where the pant leg is going to settle around your leg. Change one of them too much, and everything starts shifting.

But it absolutely isn’t all doom and gloom, DIY tailoring honestly really is super easy to learn. My beginner-friendly tailoring course walks you through everything step by step, so you can start tailoring your own clothes without guessing your way through it.
Here’s another thing beginners usually don’t think about. The front and back pieces of your pant legs aren’t exactly the same size or shape.
The back needs more room because the back of your leg is bigger and wider than the front because of your calves.
Yes, those gigantic, absolutely terrifying calves you’ve been building doing three half-hearted sets on the leg press. Because of that difference, when you lay your pants flat, the seams might not sit exactly where you expect them to. They can look slightly rotated even before you alter anything. That’s totally normal.
The important part is understanding that the original pattern was on purpose. All of those pieces balance each other once you’re wearing the pants.
Start removing fabric and you start changing that balance.
If you’ve watched any of my pants tutorials, you’ve probably noticed that I usually make my alterations along the inseam.
There’s a reason for that. Most of the time, I’m making super mild adjustments, nothing too crazy.
I’m not taking a pair of 2003 NBA Draft suit pants and turning them into skinny jeans. I’m usually just taking off about 1/4th to ½ inch or 12-24 mm at the most. The pants just need a little work, nothing too crazy. So for small adjustments like that, the inseam works great.
But if you’re trying to dramatically slim the pants, you definitely don’t wanna remove everything from one side.
Let’s say the leg is way too wide and you remove a huge chunk from the inseam. Well now you’ve changed one side of that fabric tube a whole lot while leaving the other side alone.
The pant leg starts trying to rebalance and even itself out, and one way it does that is by rotating the seams.
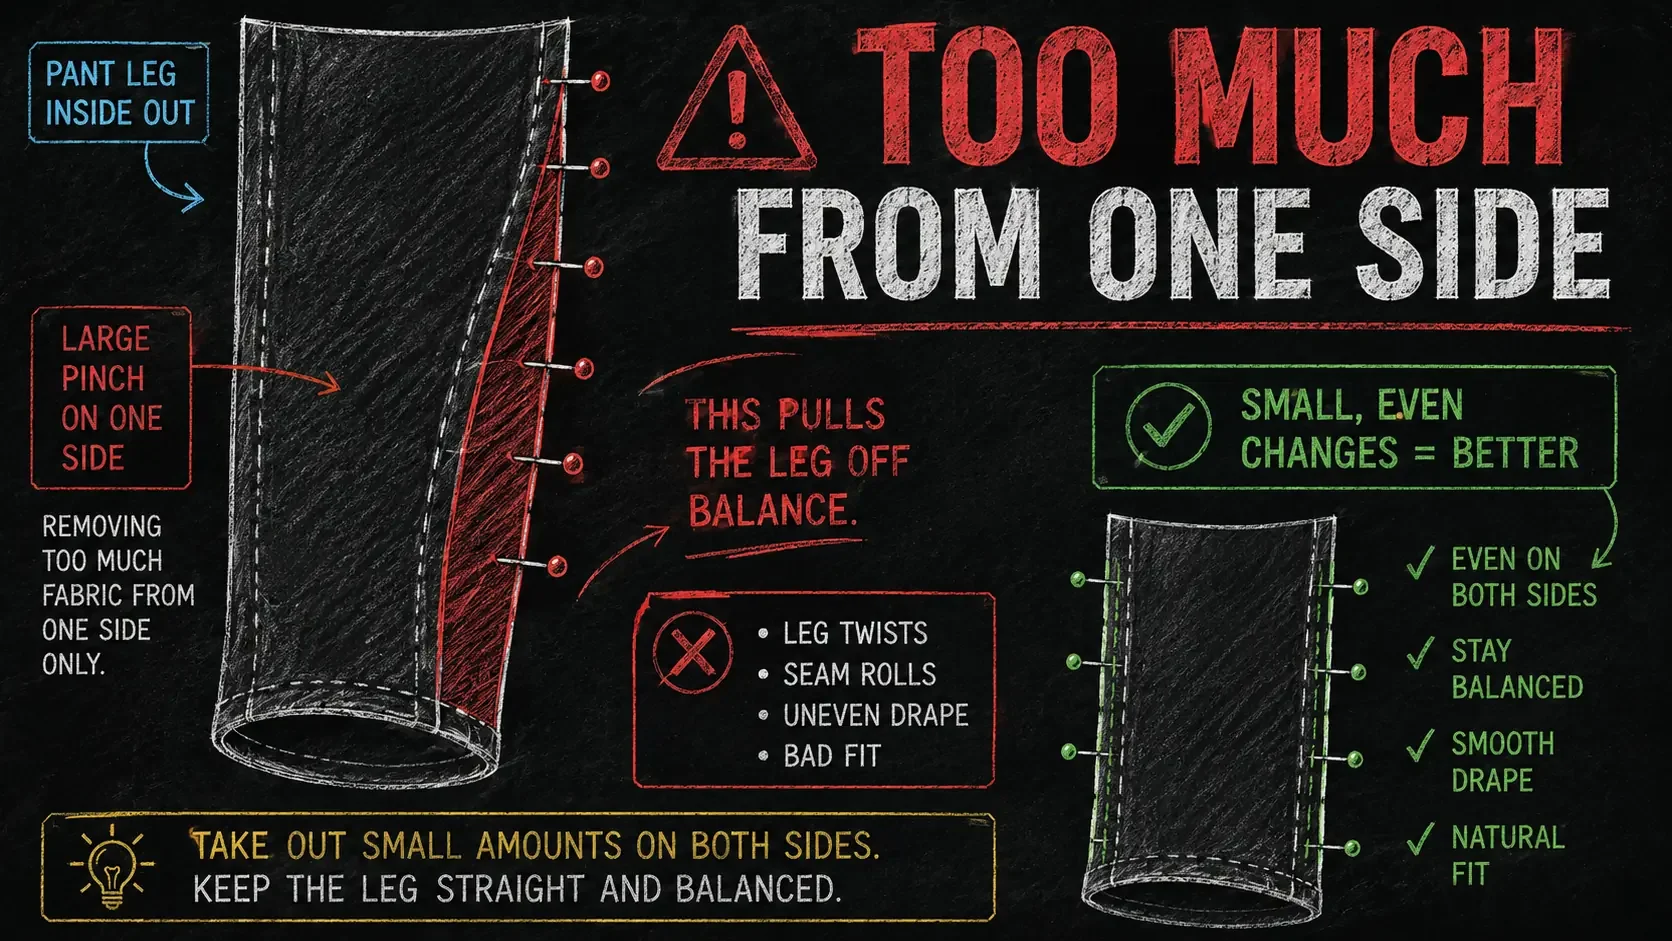
So if you’re making a bigger alteration, you’ll want to work with both the inseam and outseam instead of making one seam do all the work. Balance matters.
There’s another huge cause of pants twist too: a taper line that changes direction way too quickly and aggressively. When you’re tailor a pair of chinos or dress pants, your new stitch you’re making needs to gradually merge back into the original factory seam.
Gradually is the important word there. You don’t wanna start at the bottom and sew straight up the leg towards the knee and suddenly realize, “Oh crap. My new seam is over here and the factory seam is over there,” and then make a hard turn like you just missed your freeway exit.
That sharp transition creates a weird change in the structure of the pant leg, and now the fabric has to figure out how to deal with it.
Usually, it doesn’t deal with it in the way you want it to.
When I pin a pair of pants before tailoring them, I usually place a pin near the point where I want the alteration to end. That pin isn’t measuring anything, its just a placeholder pin.
It’s basically a giant neon sign saying, BE DONE BY HERE. As you sew toward that point, your new stitch line should slowly move closer and closer to the original factory seam.
By the time you’re about an inch away from that stopping point, you should basically be riding right along the edge of the original stitch. Then the two seams smoothly become one. No sudden turn. No weird corner. No Fast & Furious Tokyo Drift maneuver happening next to your knee.
Just a smooth transition.

A bad taper will also mess with the way your pants move when you sit and stand. Ever wear pants that feel completely normal while you’re standing? Everything’s all good in the hood.
You sit down, the pant legs ride up a little, no big deal. Then its time to go so you stand back up…and the pants stay up.
Now you’re standing there kicking your leg around trying to get the fabric back over your calf. Then you take your shoe and try to subtly push it back down. Eventually you reach down and physically pull the pant leg back into place.
Yeah…that can happen when the taper you made is way too aggressive around the knee and calf. Your knee needs room to bend. Your calf needs room to do calf stuff.
If the taper cuts inward too sharply, the fabric won’t move smoothly up and down your leg anymore.
Now instead of your pants moving with you, they’re grabbing onto your calf like, “No. We live here now.”

That’s why, before you taper your next pair of chinos or dress pants, you shouldn’t only ask, “How much slimmer do I want these pants?” or “How small do I want the leg opening?” Those questions matter, but you also wanna ask, “How do I keep the entire pant leg balanced while I make it slimmer?”
That changes everything.
Because now you aren’t just randomly slimming until the pants look the way you want. You’re thinking about where the fabric is coming from. You’re thinking about how smoothly that taper transitions. You’re thinking about the knee, the calf, and where the seams are gonna land once the pants wrap around your leg again.
Basically, you’ve graduated from “sew line, cut fabric” to “Alright, now I understand why this line goes here...”
And that right there is where tailoring your own clothes starts getting really fun.
Before you tailor your next (or first) pair of chinos or dress pants, keep a few things in mind: don’t take off all of your adjustments from one seam, you want to split more aggressive alterations between the inseam and outseam, keep your taper gradual, avoid sharp direction changes, and make sure your new stitch line blends smoothly into the original factory seam.
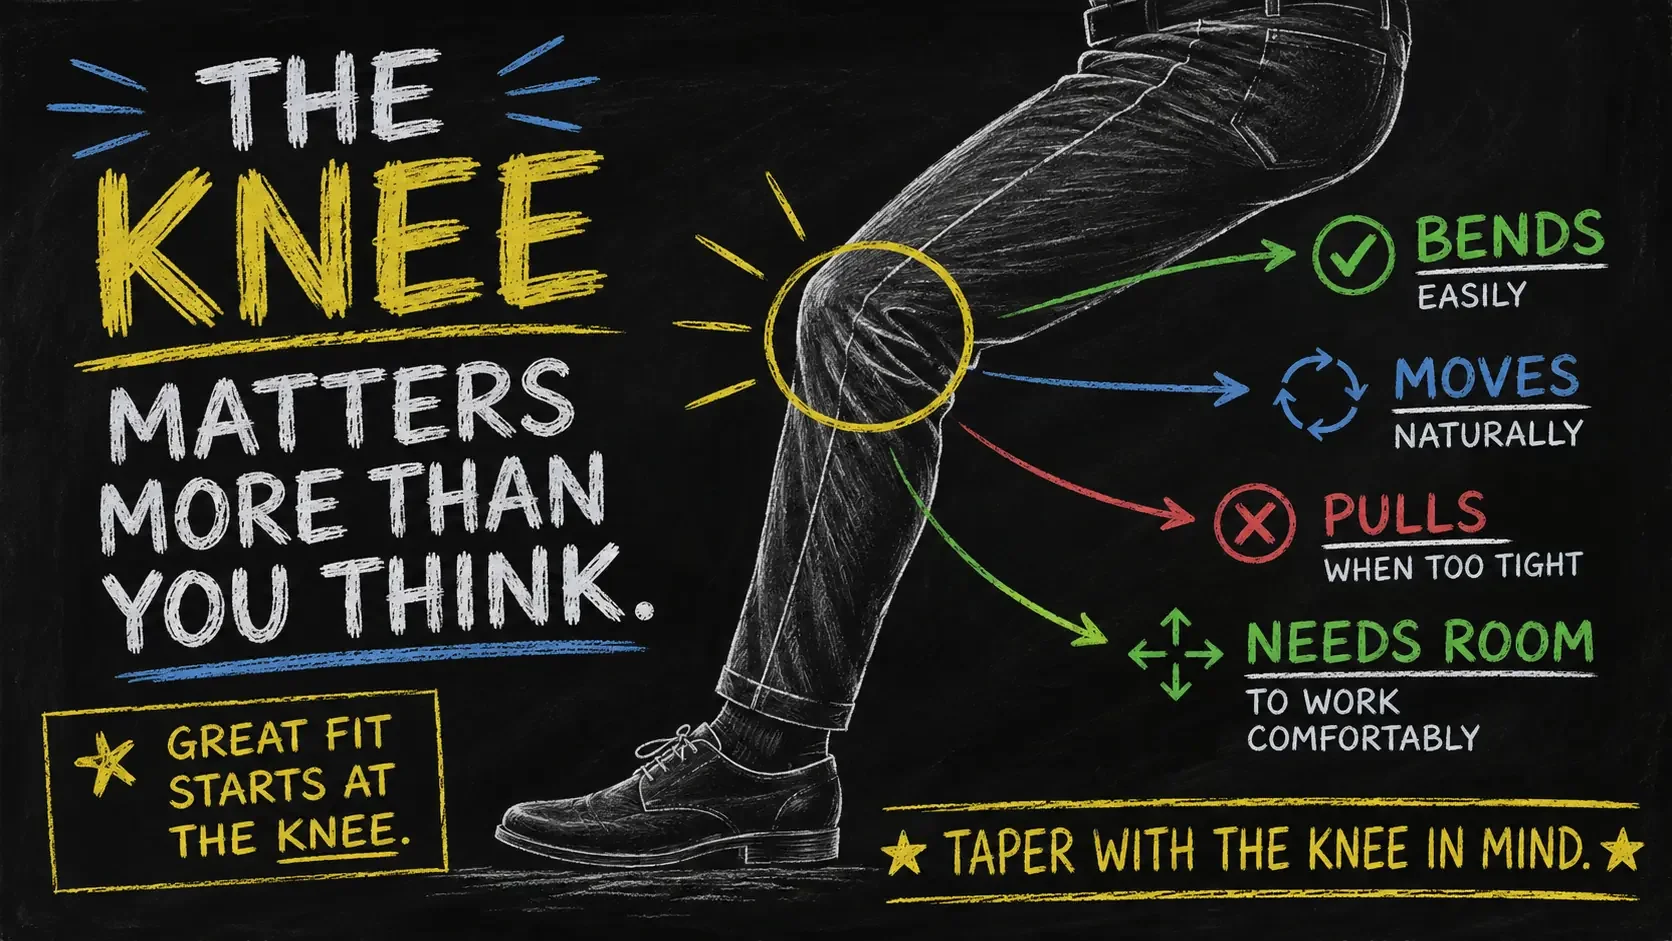
Also, try the pants on before cutting off your extra fabric. Walk around in them. Sit down. Stand back up. Make sure your calf isn’t being held hostage.
And remember this: slimmer doesn’t automatically mean better. The goal isn’t to make a pair of skinny jeans like its 2011.
The goal is to make the pants fit your body better while still hanging naturally and moving the way pants are supposed to move.
That’s really the big takeaway here. Tailoring pants is easy, but it isn’t simple. You absolutely don’t need to become some master tailor before you start altering your own pants. You don’t need twenty years of experience. You don’t need to understand advanced pattern drafting.
But you do wanna understand that every time you remove fabric, something else changes.
You’re changing the relationship between the inseam, outseam, knee, calf, leg opening, and the way the fabric wraps around your body. Once you start thinking about pants as 3D garment instead of two flat pieces of fabric sitting on a table, a lot of those beginner tailoring problems do away.
And now that you know why pants twist happens, you’re ready for the fun part: actually tailoring a pair of chinos without making the side seams wander off toward your shoelaces.